I have included affiliate links to products in this post to direct people to the art supplies I regularly use. If a purchase is made using the links I will get a commission (at no extra cost to you!) Here is a link to my Disclaimer.
Process Art is artwork where the creative process is more important than the end result. I’m not a process artist, by any means, but I love seeing work-in-progress (WIP) shots of artwork to see how it was made. The camera roll on my phone is full of WIPs; if I had to guess I’d estimate 50% of my photos are of art. Many of these get sent to friends (who are also artists) for their critique.
For today’s blog post I’m going to share my process with you, step-by-step. The piece I’ve picked is one of the illustrations for my upcoming children’s book, Counting Toasters: 1 to 10 (keep your eyes peeled for it in 2023!)
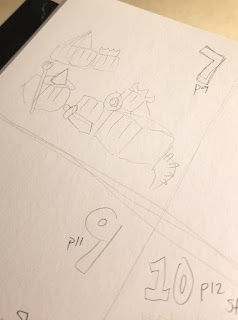
The first stage in the process was sketching. There are some artists whose sketches are beautiful and refined – mine are legible to toddlers and myself, and nobody else. For my toaster book I made small sketches for each page in my sketchbook, only about 3”x3” each. I drew them with a mechanical pencil, which is hands down my preferred sketching medium. This sketch probably took about 30 seconds to a minute.
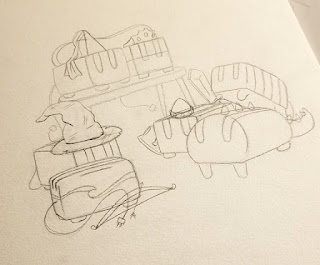
Next comes the actual drawing, still using that trusty mechanical pencil, but this time it’s on a piece of 9”x12” Canson cold press 140# watercolor paper. The drawing itself is roughly 7” square. The final book will be 6.5”x6.5” so the illustrations will be sized down slightly in the end. This stage of the process usually takes me about 20-30 minutes.
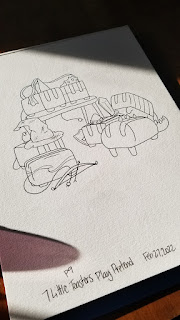
The next step is a first round of inks. Inking a drawing is basically tracing it with a pen. My pens of choice are Faber-Castell, and I have the set of 8 PITT artist pens in black India ink (I’ve had my eye on the same set in brown for years. Someday, someday.) To be honest, I only use 3 of them regularly: Medium, Fine, and Extra-Small. Occasionally I use the Brush pen, but it’s rare. Since I’m not creating anything new, just tracing over lines that are already there, the first inks take about 20 minutes to complete.
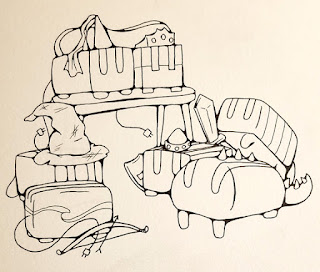
This is where it starts to get fun, with the second round of inks. I use the XS pen to vary my line thickness and round out corners to add definition. This helps the 2-dimensional drawing to have more depth, telling the eyes of the viewer that the toasters are overlapping in space. In January 2022, while visiting a local high school art class I learned that there is actually a name for this technique – neurographic. This step can take around 30 minutes or more, depending on the complexity of the drawing.
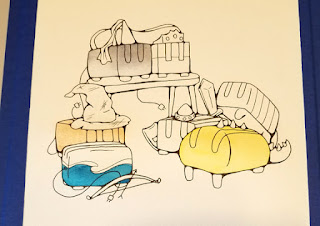
For these illustrations, I’m using Prang tray watercolor paints, and Winsor & Newton Cotman tube watercolor paints. I use soft, round synthetic brushes of varying brands and sizes. Due to my young’uns, I could only work on this picture a few minutes at a time. It actually worked out well, as I could paint a couple sections and then leave them to dry. I learned in my very first watercolor painting that continuing to paint before the previous layer was dry (aka, my impatience) only muddied things up. So I paint a few areas that aren’t touching each other and then leave it for a few hours. The actual time I used a brush and paint here was maybe 15 minutes.
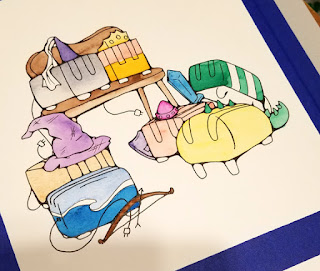
I didn’t plan out beforehand what color the toasters would be for this page – some of them I do, some I don’t. I just decided as I went; what will contrast nicely, what color hasn’t been used recently, etc. For this one, I wanted the dress-up accessories to look more like toys, so I used bright colors for the sword, shield, hat, and so on. This was probably another 20-25 minutes.
It’s really starting to come together now! I continue with my skipping around, area to area, filling it in with watercolors. This is the last time I use paint on this piece. 20-25 minutes.
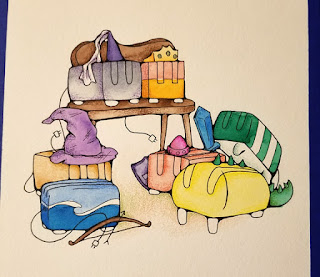
After the watercolor paint has fully dried, I break out my set of 24 Prismacolor colored pencils. I could keep going with watercolor, but like the texture the pencils pick up from the paper. I often use pencils in the same color family as the paint underneath (like yellow on yellow, green on green) but sometimes I use a different color, like a purple pencil to shade the gray princess toaster. I also decided on a color for the “floor,” which is a red-orange with some green for shading. Sometimes I will add white pencil to areas to give it a soft highlight. This took about 30 minutes.
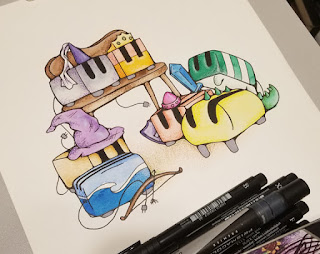
Back to the pens! Throughout the process, my black outlines have gotten covered with paint and pencil, so once the coloring is complete I go back over my black lines again with my pens. I also fill in the black toast slots, sometimes using the Brush pen for this part. On this page, I chose to color the feet of the toasters with a gray marker, more specifically a Cool Grey 50% Prismacolor Premier. As a final touch, I use a white Gelly Roll pen, size 10, to add shiny highlights. Another 20-30 minutes.
Once the ink has all dried, I scan it into my computer and open the image file in Adobe Photoshop Elements. For over 20 years I have been a devout Photoshop user, but after I got a new laptop I struggled with the price point for the Creative Suite. Elements has everything I need (though it took me a while to find all the tools that had been rearranged from CS) to do my editing and also my digital painting, so that’s the route I took. Once it’s in the program, I resize it to fit on the page, do a little color enhancement (making the background paper white, adjusting the color tones, etc.) and add the text in. The font I’ve chosen for this book is called “Stay Happy.” I adjust the text to fit nicely around the illustration and…
The computer work for each page doesn’t take as long as I’ve already set up the files, chosen the font for the text, figured out the basic layout, and picked a text color (that took over 3 hours, a few months ago.) So now each page takes about 15-20 minutes to finish up. Before printing, there will be much more extensive tweaking, making sure each page has consistent placement, all the images have been properly touched up (don’t want any dust from the scans on my toasters!) and that it all fits within the safe zones for trimming.
Final time tally for this illustration: about 226 minutes, or 3 hours and 46 minutes! (Not including the time spent just staring at it considering my options throughout each step.)


No comments:
Post a Comment